Quest for the Necromancer Epic
1.5 and 2 (By Drinal.Lathes)
Sorry that you have to read through this stuff but some people decided
to copy down my web page verbatim and not give credit
so...
Legal:This walkthrough was created for
personal use only and is © Lathes. It is prohibited to use this FAQ on your
commercial web page, magazine or game guide without first contacting me for
permission. I spent a lot of time working on this and I don't want someone else
claiming it as their own. You may use this page on your personal page
under the condition that you do not alter it and include it in its
entirety (this includes the thanks and the copyright) as well
as notify me and give me the URL by email. Thank you.
Quest for the Brightly Glowing Tome (Part of Epic 1.5)
If you already have the Scythe of the Shadowed Souls the Necromancer Epic
continuation starts with Kazen Fecae in Lake Rathe.
Lathes says "Hail, Kazen
Fecae"
Kazen Fecae says "It has been a while since we have talked. You
have done well in obtaining your Scythe. The time has come however for you to
perform another task for me. I do not wish to waste time, so in short, I want
you to collect a most powerful staff for me. I only have a piece of it as the
rest has mysteriously disappeared. I wish to research this staff piece but first
I need some special research tools. Take this note and travel to Steamfont. Find
a gnome named Biddliss Sperandu and give him the note. When you obtain the
research tools hand them to me."
You Receive:
Run over to Steamfont Mountains and find Biddliss
Sperandu at loc +174, -1355.

Lathes says "Hail, Biddliss
Sperandu"
Biddliss Sperandu says "Go away before I sic the clockworks on
ya!"
Hand the Note to
Biddliss to Biddliss Sperandu
Biddliss Sperandu says "Kazen
wants some research tools? That is fine. I want something from you first,
however. Bring me four gleaming zraxthil ores and combine them in this satchel.
Why do I want them? Who do you care? Bring them to me or you don't get your
tools. Now scram!"
You Receive: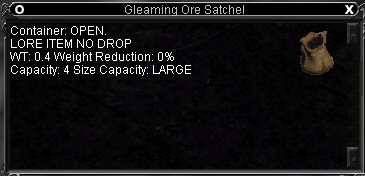
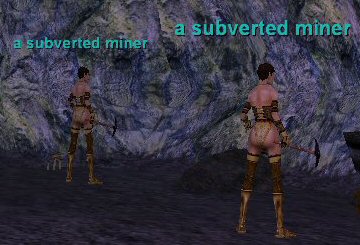
Go to the Torgiran Mines and hunt the miners; they are in the "cave\tunnel like
area". I was able to get all of mine off of A
Subverted Miner but suposedly all of them can drop it.
Kill
enough of them and...
You Receive:
You need four of them, and good luck. This part took me
longer than any of the other starting steps. It is also useful to note that
there is another item that drops off of the miners called Zraxthril
(not Gleaming). This is not the item you need.
Combine the four Gleaming
Zraxthril Ores in the Gleaming Ore
Satchel and...
You Receive:
Sealed Ore Satchel (need picture)
Back to to Steamfont Mountains and find Biddliss Sperandu at
loc +174, -1355.
Hand Biddliss Sperandu your
Sealed Ore Satchel.
Biddliss Sperandu says "So
you're not totally useless after all. Maybe there is a reason Kazen hasn't
destroyed you yet. Take these tools and give my warmest regards to master
Kazen."
You Receive:
Run back to Kazen Fecae in Lake Rathe.
Hand
Kazen Fecae the Biddliss's
Research Tools.
Kazen Fecae takes the tools
from you. he opens the case and pulls out a small magnifying glass. It seems to
faintly glow as he passes it over the surface of the staff piece. "There appears
to be a small rune etched in the wood." Kazen takes out a piece of parchment and
draws a picture of the rune. "I am not familiar with this rune. Take this
drawing of the rune to Ruandia in the Plane of Knowledge. She is an expert on
runes and should know what it means. From here on out I will want you to handle
the research of this staff thought my assistant Tebarin in the Plane of
Knowledge. I am busy and do not wish to be disturbed further. Tebarin will
communicate to me any progress you have made with helping to recover the staff."
You Receive: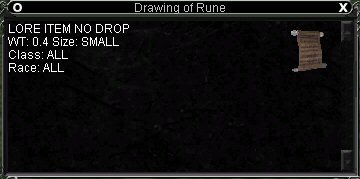
Go to the Plane of Knowledge and you will find Ruandia standing
in the wizard's building in the "neutral" part of PoK.
Hand
Ruandia the Drawing of
Rune...
Ruandia takes the drawing from
you and studies it for a moment. Her face turns pale as a look of fear overcomes
her. "You must stop your quest for whatever this rune deals with. It will only
lead to your demise. This rune has many meanigns; the main meaning essentially
being 'discord'. I am hesitant to tell you more about it, but I am sure kazen
would not be pleased." Ruandia writes some directions onto the drawing. "I am
not responsible for the outcome of your quest. Keep that in mind."
You Receive: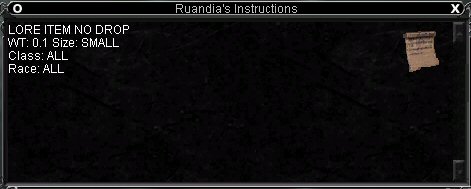
Tebarin
is located in the evail part of town in the building next to the Paineel
Portal.
Hand Tebarin the Ruandia's
Instructions...
Tebarin says "Kazen informed
me that you would be coming. Ruandia deciphered the rune for you? Good. That
thing better be accurate or Kazen will have her head. I need you to find two
balls of elemental clay and combine them in this box. Return them to me when you
have them."
You Receive: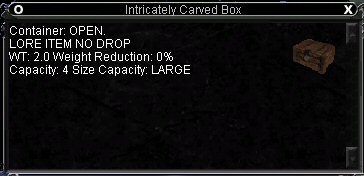
The next part can be accomplished one of two ways. You need two A
Ball of Elemental Clay. These can be gotten by killing hundreds
of golems in The Hole, or by killing several in The Plane of Earth. I
suggest checking the bazaar and merchants in and around Plane of Knowledge and
Plane of Tranquility.
After much searching and or killing...
You Receive: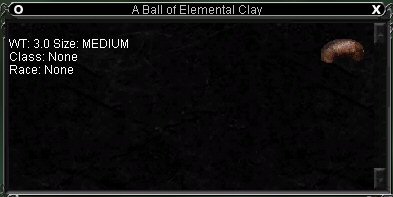
Combining two A Ball of
Elemental Clay in the Intricately
Carved Box.
You Receive:
Back to Plane of Knowledge we go and into the evil part of town to find
Tebarin in the building next to the Paineel Portal.
Hand
Tebarin the Sealed Intricately Carved
Box.
Tebarin takes the clay from
you and combines them into a large ball. He then flattens it out into a thin
sheet and carefully carves a likeness of the rune into the clay sheet with a
sharp stick. "The directions say we will require an ancient tome of lost lore. I
believe you can find one somewhere in The Hole. When you find the tome, combine
it in the intricately carved box with the oil and then hand it to me. The oil
will protect the tome for the ritual ahead."
You Receive:
You Receive: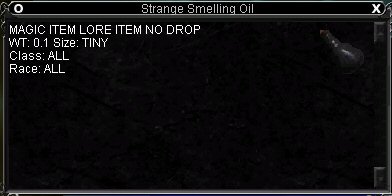
Your next stop is The Hole. You need to kill an old
gargoyle. His placeholders are the other types of gargoyles. They can be
found on buildings and walls in the "old city" areas of The Hole (the one I
killed had a A Ruined Gargoyle in its spawn before I believe). Kill the old
gargoyle and...
You Receive: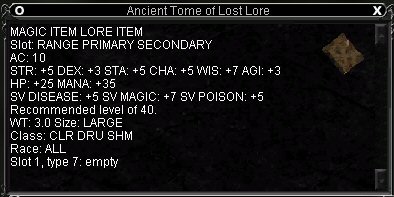
Combine the Ancient Tome of
Lost Lore and the Strange Smelling
Oil in the Intricately
Carved Box and...
You Receive:
Take the A Protected Tome back to the evil part of
town to find Tebarin in the building next to the Paineel
Portal.
Hand Tebarin the A Protected
Tome...
Tebarin presses the sheet of
clay into the tome and closes it. A red glow begins to engulf the tome. Tebarin
opens the tome and you can see words slowly start to appear on the pages as if a
ghost were writing on the pages. Tebarin studies the words within for several
minutes. "There is an explanation of the history of the staff. I have decided
that our best bet of obtaining the staff is for me to attempt to summon it from
its home plane of existence. I would advise you to prepare for the worst. This
could end up being very dangerous. Hold the tome for a moment and try to attune
yourself to its magics. hand it to me when you are ready for me to begin the
summoning."
You Receive:
Quest for the Paladins (Part of Epic 1.5)
That last step was
kind of pointless. Hand Tebarin the Brightly
Glowing Tome and...
Tebarin holds up the book with
both hands and begins to chant. After several minutes, a sudden flash blinds
you. When you regain your vision a few seconds later, you are amazed to see the
staff floating in the air before you. before you or Tebarin are able to take the
staff as your own, a booming voice echoes throughout the room, "All who seek my
staff will be destroyed!" An explosion of bright magic stuns you as a magical
portal opens. Five heavily armored paladins step through the portal and grab the
staff. Tebarin tries to follow them into the portal but it disappears. "This
cannot be!" cries Tebarin. "We must ensure this tome does not also fall into the
hands of the paladins. The tome is out only hope of recovering the staff before
the paladins destroy it. We must build a [special box] that will protect the
tome. Take this rune-covered insert. You will use it to construct the box."
You Receive:
Lathes says "what special
box"
Tebarin says "I must have a box made to protect the tome from these
thieves! In addition to the rune-covered insert I have given you, you will also
need one piece of gnarled wood, and one elaborate hinge. Find those items and
combine them in a forge to make the box. If you fail, Kazen and I will not be
pleased. Now go!"
Head over to the Plane of Nightmare and start
killing the A Gnarled
Treants. You are in search of some Gnarled
Wood.
Gnarled
Wood is not terrably hard to get, just use OOC in the Plane of
Nightmare for it and kill as many Treants as you can and...
You Receive:
The second part is more tricky. You need to find an
Elaborate Hinge. This drops in the Plane of Innovation
off of a scrap collector. The problem is these NPC's are uncommon, and this is
an uncommon drop off of them.
After pulling your hair out for a while in
the Plane of Innovation...
You Receive:
The next part of the quest requires smithing skill.
As of now I have confirmed it is NOT trivial at any skill that I've heard of. I
combined mine at 151 but failed three combines before it at 108 and two at 117.
Suposedly Wednesday they are going to lower the trivial so may want to
hold your combines till then!
Combine your Elaborate Hinge,
Gnarled Wood and Rune Covered Insert in a forge and...
You Receive:
Heading back to PoK to find Tebarin.
Hand Tebarin the Glowing Box of
Protection.
Tebarin says 'This should do
nicely. At least I hope so, for your sake. Now that the box is secure, I want
revenge on the paladins who took the staff! Fine all five of the paladins and
take their heads! Once you have their heads, combine them in this sack and hand
it to me. I will make sure they are reanimated and suffer for many, many years
for what they have done. Now leave me. I must ponder the turn of events that
have taken place here.
You Receive:

The next 4 steps are all esentualy the same. Take your headhunting sack to any
one of the Karana zones (North Karana, East Karana, South Karana, West Karana)
and bring a tracker if you want to make life easy on yourself.
You are
looking for four paladins. They are, all four, level 70. I'll explain this as
best as I can. The paladins are very resistant. Having someone who can tash or
malo will make your life tons easier. They ARE snareable they do NOT summon. You
can guess what that means. Kiteing time!; but wait there is a catch. They cast a
single target stunn and a single target mana tap (two different spells). They
also hit for OVER 1600 a swing and can tripple. You won't likely land snare the
first time so then you have a Paladin running at you casting stunns to catch up.
THeir names are Sir Arlindo Goldheart, Sir Gerwin
Thunderblade, Sir Telian Mottsworth and Sir
Gregon Sulltor and they all run when they are around five percent
health.
How to beat them? I personaly used a shaman to Malos the pally,
and a necro friend (thanks Zhao) to snare it while I ran like a scared little
girl. I wasn't able to land Malosinia but I can assume you could substitute Tash
for Malo in that situation and still be well off. Beyond that once he's snared
you have beat him. Just dot (fire line works best) and keep him snared! It may
take several times to land sare but just keep whoever has agro running and if
you don't have runspeed 5 you will want a SoE.
Kill the paladin in each
of the four Karana zones (for a bit more lore notice what they say when they
die) and...
You Receive:
You Receive:
You Receive:
You Receive:
With the bloody deed done, combine your Sir
Telian's Head with your Sir Gregon's
Head and your Sir Gerwin's Head and your
Sir Arlindo's Head in your Paladin
Headhunting Satchel and...
You Receive:
Take your Full Paladin Headhunting Satchel back to Tebarin in the Plane of
Knowledge and...
Tebarin says, 'Your donation
will please my masters greatly. I have a special reanimation spell reserver just
for these do-gooders. Now you are to travell to Natimbi and find the paladin who
has the staff. You might want to talk to the dead you come across as they often
have valuable information. Take this orb to help enhance your natural abilities
to communicate with the dead.'
You Receive:
Quest for the Soulwhisper (Epic 1.5)
Now that you can better
talk with the undead you need to head over to Natimbi.
You are in search
of Whiahdi. She is standing just east of the undead camp in
Natimbi.
Lathes says 'Hail,
Whiahdi'
Whiadi says 'You speak to the dead? Not many have that talent.
What is it you want from me, mortal?
She will ignore you unless you
have the Orb of Deathspeaking.
Lathes says 'The
staff'
Whiahdi says 'Yes. I did see a paladin with a staff. Before I give
you any more information however. I wish for you to perform a task for me. i
need you to travel to Barindu and find my most percious possessions from when I
was once alive. A muramite in Barindu killed me and took all I owned. If you can
get my earthly possessions back, i will help you in regards to the location of
the paladin. Find my brother, Taiandao in Barindu. He is still among the living,
but is a slave of the vial muramites. Ask him if he knows of the muramite that
killed me.
Run over to Barindu with a few of your friends (a good solid group of Time+
equiped people should be ok, or two groups
otherwise).
Taiandao is located in side a hut to the
northwest of the zone. It is directly north from the Ferubi zone line and the
first thing you hit if you were to run north from it. He is in the north east
corer of the room.
I'm fairly sure that you have to hail
Taiandao before you say this phrase.
Lathes says 'What Muramite
killd Whiahdi'
Taiandao says 'Yes I know the one who took her life. His
name is Viarglug. I hate him with every fiber of my being. If you kill him, I
will forever be in debt to you. He should be shomewhere nearby making life
miserable for a slave.'
By one of the corn fields (Just north of
the tower that stands North East from the Ferubi zone line) spawns Viarglug.
He's quit mean. He is kos but will not agro anyone until he is hailed or
attacked. His melee isn't too bad and can be easily healed by a druid, the catch
is he has an area of effect attack. The AE is a mana drain DoT and will
overwrite Lich and KEI/VOQ. You'll need nice dps to beat him before healers run
out of mana. I also suggest pulling him to the Ferubi zone line so that you
don't have to worry about the trash.
Kill Viarglug and...
You Receive:
I should also note that by Viarglug's corpse
spawned a chest with one item inside it. This is I assume to help you pick up a
group to kill him. It contined:

Run your
Whiahdi's Earthly Possessions back to
Whiahdi in Natimbi.
Hand Whiahdi's Earthly
Possessions to Whiahdi and...
Whiahdi says 'You found my
possessions! I am most greatful. The paladin you seek did walk by here some time
ago. I believe he was on his way to Qinimi. He had a curious staff with him that
seemed to whisper dark tidings. That staf seemed to have a very evil presence
about it. I would advise you to let the paladin destroy it. I have in my
possession another staff of great [power]. I can tell you about if you give up
your quest for the paladin and the dark staff. However if you with to [locate
the paladin] I will help you since you did help me.
Lathes says 'What
power'
Whiahdi says 'I have come to know many spirits from other realms.
they speak of a being known as Tarlang who resides in the Realm of Discord in a
area known as the Nobles causeway. He has wronged many of my kin and I wish to
see him pay for what he has done. If you bring me his head. I will reward you
with a weapon of great power. He believes himself to be indestructible, but he
is not. In fact I think you have what it takes to destroy him.'
Lathes
says 'I wish to locate the paladin'
Whiahdi says, 'I fear for you should
you seek the staff, but I promised to help you. I can still hear the staff's
dark whispers. It appears that the paladin wielding the staff has been killed
and the staff returned to its master. The staff's master has broken the staff
into three pieces. two of the pieces have been given to his most trusted
minions, and the third piece, a globe of discordant energy, resides in a
location known as Anguish, in the Realm of Discord. If you wish to somehow
rebuild the staff you must find these three pieces. I can still hear the staff
begging for its master. The staff tells me the only way the minions will appear
is if a certain phrase is uttered at a place where the power of discord seeks to
engulf all. The phrase is, 'Sanait Sanaiij Tsulum'. I don't know what it means
or where this place of great discord is however. I'm sorry that's all the staff
has told me. If you find all three staff pieces, return them to me along with
Soulwhisper and I will see if I can reform the staff for you'
Off to Nobles Causeway to find Tarlang. If you don't have a tracker he is on the
left path all the way left all the way to the end of the tunnel.
There
are see invisability mobs on the way to him so if you plan on running there to
check it out, be careful. Once you get to him, he is a blue con (or he should be
if you are doing your epic 1.5 :p) and is a Kyv. If and only if you have
completed all previous steps (including saying what power to Whiahdi in
Natimbi!) he will ignore you. If you have said 'what power' to Whiahdi then
hailing Tarlang will cause him to respawn as a red-to-70. His max hit on me was
in the 3190's and he quadded it seems. He also has a weak aoe not worth
mentioning. I took 29 GoD equipped people against him and could have done it
with less. I suggest using DA before you hail him. He agros you when you hail
him, and I don't know many necros who can stand up to a 3k quad.
Tarlang
only stays up for 25 minutes after you spawn him and if you just spawn him to
see if it works or fail and he despawns you MUST go back and tell
Whiahdi 'what power' or Tarlang will ignore you as the blue con
form!
Kill Tarlang and...
You Receive: Tarlang's
Head (Need Picture)
Much like Viarglug, Tarlang spawned a chest after
death. It contined:

Now go to Natimbi and hand Whiahdi the Tarlang's
Head and...
Whiahdi says, 'Take this
weapon for helping me. I regret giving away a weapon of such power, but having
it near me was most unsettling. Do not ask how I obtained it.
You Receive:

Sorry I can't
post a picture of the pet it summons because the click effect is bugged. The
casting range on it is set to 0 and thus you can't cast it on anything. /bug it
in game if you get bored; maybe if enough of us do it wednesday when they patch
I can post a pet picture!
This is the epic 1.5,
not 2.0 and no I do not have information on how to start the quest if you do not
have the origional necro epic. I had my epic and therefore have no way of doing
that portion of the quest. I do not mind if you send me a cross server tell in
game or an email, but read this walkthrough completely before you do. Having to
answer the same questions 50 times a day makes it hard to
kite!
More as it comes!
Thanks:
Foliax for some of the early quest lore text
Xeudian for
some of the pictures
Ravantha for the picture of Drawing of Rune
Valius,
Hikammer, Zhao and Slaeni for helping with the fights
Contact
Me | ©2004 Lathes [Drinal] <Silent Tempest>